APOPKA, FL · HOME REPAIR & RESTORATIONExplore Apopka service area
Home Services ApopkaCall (407) 469-7898 ↗
Kitchen Remodeling · Apopka, FL

Countertop Installation in Apopka, FL

The stain that won't lift. The chip right at the sink edge that catches your sponge every morning. The seam you can feel with your fingertip — and the dark line of caulk under the sink where water has been sneaking into the cabinet. A countertop fails in small, specific ways long before it looks "old," and in Central Florida's humidity those small failures move faster than most homeowners expect. This page walks you through the countertop decision the way a careful fabricator would: which materials actually suit Florida kitchens, where seams and sink cutouts go wrong, what templating day decides, and what installation day looks like hour by hour — so the top you live with for the next twenty years is chosen on facts, not showroom lighting.

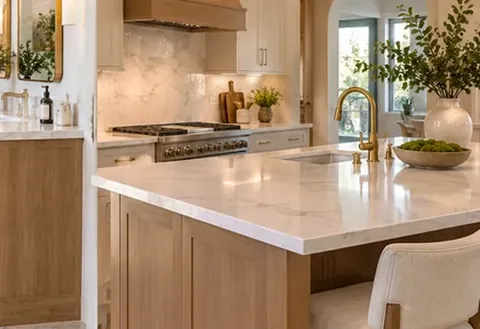
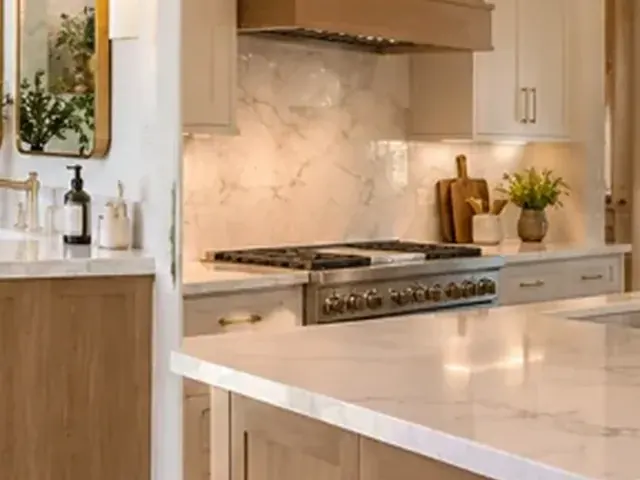
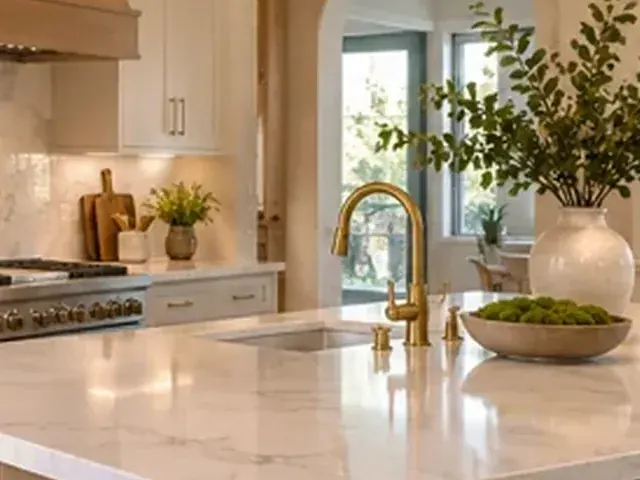
Kitchen stone countertop and sink area
Countertop Installation · Apopka, FL

This page walks you through the countertop decision the way a careful fabricator would: which materials actually suit Florida kitchens, where seams and sink cutouts go wrong, what templating day decides, and what installation day looks like hour by hour — so the top you live with for the next twenty years is chosen on facts, not showroom lighting.

⌖ Apopka, FloridaCall about this serviceReview the scope before approving work
The moment it's worth calling -->

Four signs your countertop is telling you something

Each of these is a decision point, not just wear. Each comes with what to do right now.

01 / Symptom

Stains that survive every cleaner

A dark ring around the faucet or a coffee stain that laughs at scrubbing means the sealer has failed on porous stone — water is now soaking into the slab itself, not sitting on it. In Florida's 70–80% ambient humidity, an unsealed stone stays damp longer between uses, which accelerates the staining cycle. Do now: the bead test. Flick water onto the stone. If it beads for 10–15 minutes, the sealer is holding. If it darkens the stone within minutes, the protection is gone — note where, and photograph it.

02 / Symptom

A chip or crack at the sink cutout

The narrow rail of stone in front of an undermount sink is the thinnest, most stressed part of the whole top — it's where stone cracks if it cracks. A chip there isn't cosmetic; it's the stress point announcing itself, and thermal shock (a hot pan near a cold, thin rail) can turn a chip into a running crack. Do now: stop setting hot items anywhere near the sink rail, and don't lean on that edge. Photograph the chip with a coin for scale — a fabricator needs to see whether it's surface or structural.

03 / Symptom

Swelling or separation at a seam

Laminate tops swell where moisture reaches the substrate; stone seams open when adhesive fails or cabinets shift. Either way, an open seam is a water channel straight into your cabinet boxes — and in a humid kitchen, what's under that seam stays wet. Do now: run your finger along every seam. If you feel a lip or see darkening, keep that area dry and don't caulk over it yourself — trapping water under fresh caulk makes it worse.

04 / Symptom

Black or peeling caulk at the undermount sink

That bead of sealant is the only thing keeping sink water out of your cabinet. When it cracks, shrinks, or turns black, water seeps under the sink lip with every splash — soaking the cabinet floor where you'll never see it until the musty smell starts. Do now: open the sink cabinet and look with a flashlight. Soft, discolored, or swollen cabinet floor means water has been getting in for a while. Wipe up standing water and keep the area dry until it's addressed.

Once you've matched your moment, the next question is scope: what does a countertop installation actually include — and where does it stop?

What the job includes -->

What countertop installation covers — and where it stops

A complete installation covers six things. If any are vague in a proposal, ask before templating day, not after.

Material selection, honestly. Quartz (non-porous, no sealing, but vulnerable to extreme heat and UV fade in strong sun), granite (heat-tolerant, but needs periodic sealing and can crack from thermal shock near thin cutouts), butcher block (warm and repairable, but demands a regular oiling schedule and punishes standing water at seams and sink edges in humidity). Marble etches where citrus splashes — a busy family kitchen is a hard place for it. The right material is the one that matches how you actually cook, not the one that looked best under showroom lights.

Templating. After old tops come off (or before, with laser templating), the fabricator maps your exact kitchen — walls are never as square as they look. This is the appointment where sink model, faucet, cooktop, and appliance specs must be final: the cutouts are cut from this template, and changing the sink afterward means recutting stone.

Fabrication. Your slabs are cut, edged, and polished at the shop. Seams are planned here — a good fabricator shows you where they'll fall and why, and keeps the front sink rail as thick as the layout allows (roughly 3 inches for granite, 2.5 inches minimum for quartz). Inside corners get radiused, never sharp 90s, because sharp corners chip in real life.

Removal and disposal of the old tops. Confirm this is included — a top glued to tile backsplash can take some backsplash with it.

Installation, sink mounting, and sealing. Stone is set, leveled, and seamed; the undermount sink is mechanically fastened (not just glued) and sealed with 100% silicone; natural stone gets its initial sealer coat.

That's the scope. Now the question underneath it: what happens if you wait on the signs above?

Countertop installation versus cabinet installation

Countertops depend on accurately measured and level base cabinets. If the cabinet boxes are sound, the main task is templating, cutouts, seams and installation over the existing support. If the boxes are damaged, out of square or being moved, review kitchen cabinet installation before commissioning a countertop template.

What waiting costs -->

What waiting does to a failing countertop — the mechanisms, not the fear

The rail crack spreads

The sink rail crack spreads.

Stone doesn't heal. A chip at the thin rail concentrates stress every time the top flexes — a heavy pot set down hard, someone leaning on the edge. Thermal shock does the rest: hot meets cold at the thinnest point. What starts as a cosmetic chip becomes a crack running the length of the rail, and at that point the section gets replaced, not repaired.

The open seam feeds the cabinet

The open seam feeds the cabinet.

Every splash, every wipedown, every steam kettle sends water into an open seam. Particleboard cabinet boxes swell and never un-swell; plywood delaminates. In Florida humidity the cabinet interior dries slowly, which is exactly the condition mold needs. A seam you could feel in March is a swollen cabinet floor by hurricane season.

The sealer keeps score

The failed sealer keeps score.

Each month unsealed stone absorbs a little more — cooking oils, coffee, hard-water minerals from the Floridan Aquifer. Stains that would have wiped off a sealed top become permanent residents. Resealing later can't pull out what's already soaked in.

Heat damage is instant

Heat damage is instant and permanent.

One very hot pan left on quartz can discolor it in minutes. There's no waiting your way out of that one — but knowing it now changes a habit that costs nothing.

Three safety checks before installation day

  • Stone is heavier than it looks

    A typical slab section weighs hundreds of pounds — quartz runs about 30 pounds per square foot, so a single run can pass 300–500 pounds. Let the crew handle every lift with suction cups and spreader bars. Don't "help" by grabbing a rail — that's how the thin sink section cracks before it's even installed.

  • Cutting makes silica dust

    If any cutting happens on-site, the crew should control dust at the source. Keep kids and pets out of the kitchen and adjacent rooms while cutting is underway, and don't run your HVAC fan on high until the dust settles — you don't want it pulled into the ductwork.

  • Water and power get isolated

    The sink disconnect means water off at the shutoffs (know where yours are before the crew arrives). If a cooktop cutout is involved, the circuit stays off until the appliance is set. Don't restore either early to "test" — the silicone needs its cure time.

Why Apopka changes the math -->

Why Apopka changes the countertop math

Humidity is the constant

Central Florida sits at 70–80% relative humidity much of the year, and your kitchen adds cooking steam on top. That matters three ways: porous stone needs sealing more often here than the national advice assumes (run the bead test yearly, not "every few years"); butcher block's oiling schedule is non-negotiable, not aspirational — skip it and the wood moves; and any water that gets under a sink lip or into a seam dries slowly, which is why small leaks become cabinet damage here faster than in dry climates.

Sun through the patio doors

Many Apopka kitchens open to a lanai or patio with big glass. Intense UV pouring through that glass degrades low-grade resin binders in some quartz and fades sealants — a South Florida fabricator guide flags this as one of the top five failure patterns in the state. If your counters sit in direct afternoon sun, say so during material selection; it's a real input, not a footnote.

Hard water spots

Floridan Aquifer water is mineral-heavy, and dry season concentrates it further. Those white spots around your faucet aren't just on the fixture — the same film settles on dark stone and etches in if left. A quick daily wipe-down of the faucet zone does more for a dark top than any specialty product.

Storm-season timing

If your project involves any exterior-adjacent work — and in Florida, check your HOA or condo association's architectural-review rules before sink relocations that touch plumbing — summer's daily downpours can complicate delivery and scheduling. Plan the install before the holiday cooking season, not during it.

Installation day -->

How a countertop installation runs, start to finish

  1. Final measure and template

    The fabricator templates your exact kitchen — every wall wave, every out-of-square corner. Your sink, faucet, and cooktop models must be decided and on-site or fully spec'd: cutouts are cut from this template. Verify the template against your appliance spec sheets before it leaves your house.

  2. Slab selection

    You choose your actual slabs (for natural stone) or your pattern and lot (for quartz). For stone, look at the full slab, not a sample — veining and color shift across a slab, and the sample is always the prettiest square inch. Ask which remnant gets saved; if a section ever needs partial replacement, matching the original lot is everything.

  3. Fabrication

    Cutting, edging, and polishing happen at the shop. Seams are placed deliberately — away from high-stress zones where possible, with the sink rail kept thick and inside corners radiused. Undermount sink rails get reinforcement where the design demands it.

  4. Removal day

    Old tops come out; the crew checks the cabinets for level and soundness. If a cabinet box is swollen from an old sink leak, you'll hear about it now — that's the moment to decide, not after the new stone is on.

  5. Set, seam, and mount

    Stone is set and leveled, seams are joined and polished flush, the sink is mechanically fastened and sealed with silicone. Natural stone gets sealed. Edges are eased — a crisp 90-degree edge looks sharp in photos and chips in real life.

  6. Cure and walkthrough

    Silicone needs roughly 24 hours to cure — no water at the sink, no weight on the seams. Walk the whole top with the installer: run your hand across every seam, check the sink reveal is even, confirm the sealer was applied. Anything you accept at walkthrough is yours afterward.

Before you call -->

Before you call: what's urgent, what can wait, and what to have ready

Call now

  • a crack running from the sink cutout (it's spreading), black moldy caulk with a swollen cabinet floor underneath (active water intrusion), a separated seam with visible water underneath.
  • These get worse on their own.

Can wait for a planned visit

  • staining that bothers you but isn't spreading, a material decision you're still researching, a planned remodel months out.
  • These deserve the full template-measure-fabricate sequence — not a rush job.
  • But don't "wait" by ignoring the four warning signs; note them and mention them on the call.

Have ready when you call

  • Rough measurements of each run (length × depth)
  • Your sink model (or the spec sheet — undermount vs. drop-in changes the cutout and the rail)
  • Faucet and cooktop models
  • Photos of the warning signs (chip with a coin for scale, seam gaps, cabinet interior)
  • Whether the layout changes (moving the sink means moving plumbing — a separate trade)
  • If you're in a condo or HOA community, have the architectural-review contact handy

With that in hand, the call is short and productive —

While the work is underway -->

What to expect while the work is underway

  1. Kitchen offline

    Your kitchen goes offline

    Plan on 1–2 days without a functioning sink, and no water at the new sink for about 24 hours after install while the silicone cures. Set up a temporary station — bathroom sink, utility tub, paper plates. Nobody tells you this until the crew is already there.

  2. Dust and noise

    It's dusty and loud in bursts

    Removal day is the noisy one — prying, cutting, hauling. If any cutting happens on-site, expect dust despite containment; cover nearby open shelving and don't run the range hood on high until it settles.

  3. The reveal check

    The reveal check is yours to do

    After install, run your hand across every seam (you should barely feel it), sight down the runs for lippage, check the sink reveal is even all around, and confirm edges feel eased, not sharp. This is the walkthrough — speak now.

  4. Seam care

    Keep weight off the seams

    For the first day, don't load the seam zones or lean on the sink rail. Stone is strong in the middle of a span and vulnerable at joints and thin rails — treat those areas gently while everything cures.

Helpful answers — MUST match faq-schema.json exactly -->

Countertop Installation FAQs

How do I know if my granite needs resealing?

Flick water onto the stone — the bead test. If it beads for 10–15 minutes, the sealer is holding. If the stone darkens within minutes, the protection is gone and it's time to reseal. In Central Florida's humidity, test yearly rather than going by the national "every few years" advice — moisture accelerates sealer breakdown here, and an unsealed top absorbs every spill a little deeper.

Is quartz or granite better for a Florida kitchen?

For most Florida kitchens, quartz wins on maintenance: it's non-porous, so humidity, staining, and mold aren't factors, and it never needs sealing. Granite wins on heat tolerance and natural character, but it needs periodic sealing and can crack from thermal shock near thin cutouts. If your counters sit in strong afternoon sun through patio doors, mention it — UV can degrade low-grade quartz resins over time.

Why is the seam where it is — can it move?

Seams follow slab sizes and stress logic. A good fabricator places them away from high-stress zones where possible — and at sink cutouts, a seam in the thin rail can actually be protective, letting any crack form between joints instead of through the stone. Ask where your seams will fall before fabrication, not after installation. "No seams at all" is only possible on small runs; anyone promising it on a large kitchen is planning something you'll see.

Can you install new countertops over my existing ones?

Overlays — a thin layer bonded over existing tops — exist, but they're a compromise: they add thickness (which complicates sink and appliance interfaces) and can trap moisture if the old substrate is compromised. They suit rentals and fast refreshes. For a kitchen you'll live with, full replacement is the durable answer — and it lets the crew inspect the cabinets underneath for old water damage.

Undermount or drop-in sink — which is better with stone?

Undermount, done right: no lip to catch crumbs, and the sink is mechanically fastened plus sealed with 100% silicone. But "done right" matters — the seal is the only thing keeping water out of your cabinet, and a failed bead means hidden water damage in a humid climate. Drop-in is more forgiving of imperfect sealing but leaves a rim to clean around. Either way, the sink model must be final before templating.

How long does installation day actually take?

Removal and installation usually run one to two days for a typical kitchen: old tops out and cabinets checked on day one, stone set, seamed, and sink mounted, then roughly 24 hours of silicone cure with no water at the sink. Fabrication happens at the shop beforehand — ask for the shop's current lead time when you schedule, since it varies by season.

Will butcher block survive a Florida kitchen?

It can, but it demands the maintenance schedule — regular oiling, no exceptions, and never letting water sit at seams or sink edges. In 70–80% humidity, unoiled wood moves: it swells, shrinks, and opens the exact gaps water loves. If you're honest about the upkeep, it's warm and repairable (sanding erases years). If you're not, choose quartz and skip the guilt.

What if the installed top has a flaw — a bad seam, wrong color, a chip?

Speak at the walkthrough, not a month later. Document with photos immediately: seam lippage you can feel, color that doesn't match the approved sample, chips at edges or rails. A reputable fabricator re-polishes seams, and genuine fabrication errors get remade — but "I don't love the veining" after approving the slab is a different conversation. This is why slab viewing and template verification happen before cutting, not after.

Further reading

Sources and technical references

View supporting references and safety sources
  1. Natural Stone Institute

    the stone industry's technical guidance on sealing, seam placement, and sink-rail reinforcement.

  2. NSF/ANSI 51

    the food-contact surface standard that certified solid-surface and quartz materials are tested against for food-zone safety.

  3. Quartz manufacturer care guides

    heat limits, UV exposure guidance, and cleaner restrictions published by the brands themselves.

  4. Trade fabricator best practice

    templating verification, rail-thickness rules, and reinforcement methods documented across the fabrication trade.

Before you sign anything: get the templating method, seam placement, sink-mounting method, and what's excluded (plumbing reconnects, backsplash) in writing — then compare proposals line by line, not by the bottom number. How to compare home service estimates ↗

Read the related homeowner guide ↗

Ready to talk stone — not just samples?

Call with your sink model, rough measurements, and photos of what's failing. Ask how they template, where your seams will fall, and what happens if the cabinets underneath aren't sound. The answers tell you everything about the fabricator.

Apopka, FLCountertop Installation ☎ (407) 469-7898